The Photoshop Effect That Instantly Hooks Your Students (And Builds Real Skills)
Apr 26, 2026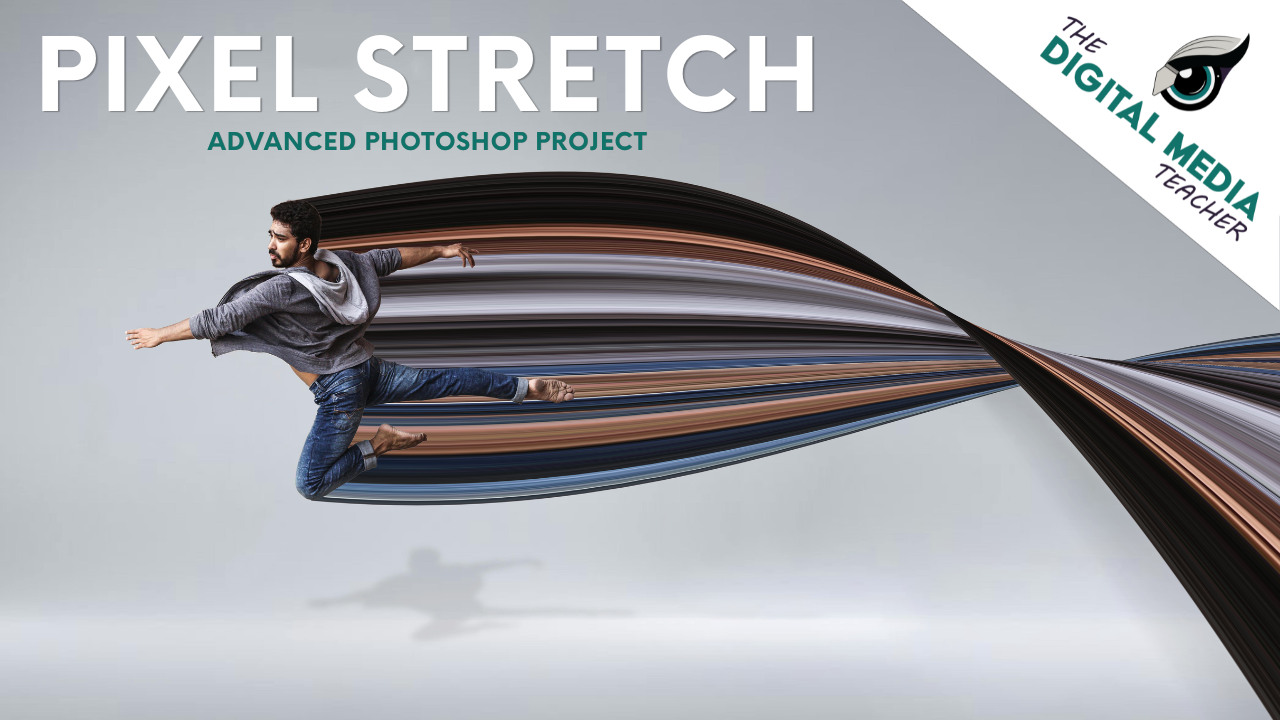
There’s always a point in teaching Photoshop where you can feel the shift in the room. Students either start leaning in, experimenting, and asking questions, or they start clicking randomly and hoping something works.
A lot of that comes down to whether the project feels meaningful. If it looks like something they would actually create outside of class, they are much more willing to engage.
The pixel stretch project is one of those lessons that consistently gets students interested right away. It looks complex at first, but once they go through the first few steps, it starts to make sense.
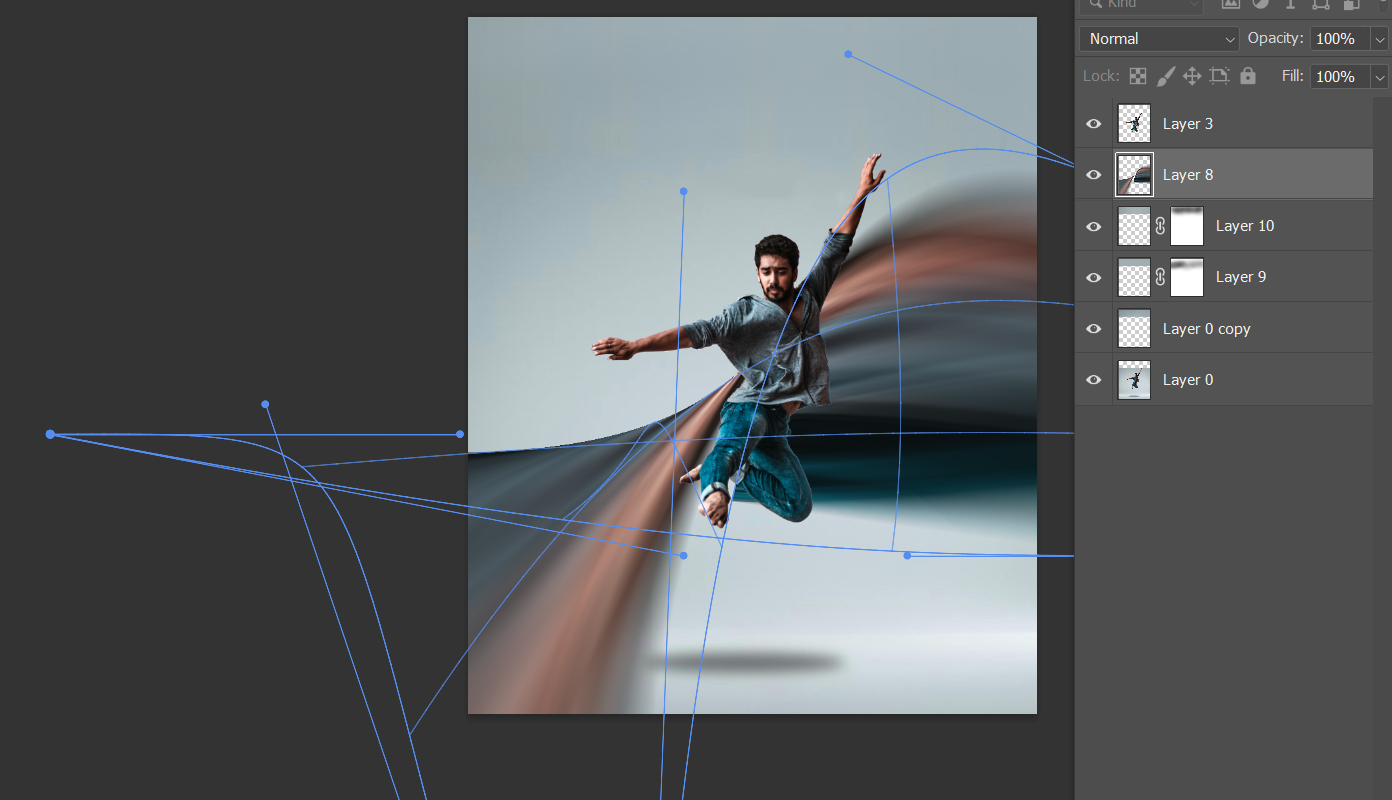
At its core, the effect is simple, students select a very thin strip of pixels, duplicate it, and stretch it to create motion or distortion. That process starts in Step 3 when they make their selection and continues through Step 5 when they stretch the pixels.
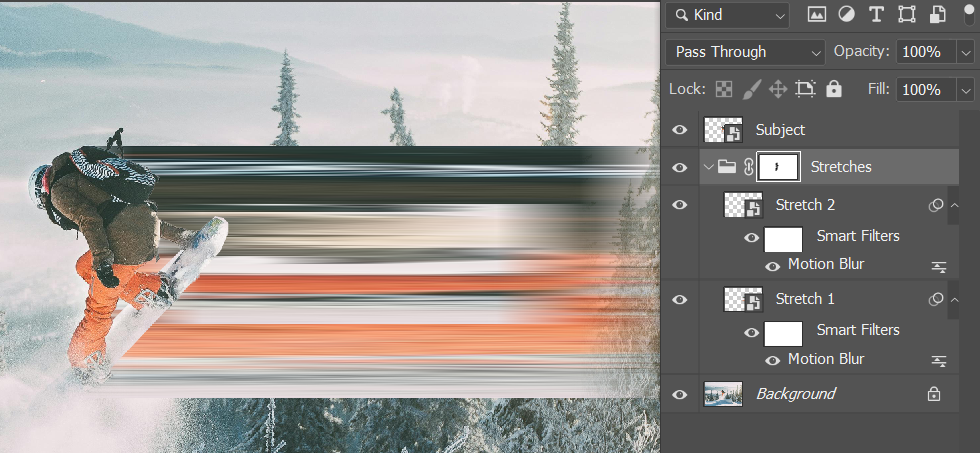
What makes this lesson valuable is that students are not just creating an effect. They are building foundational Photoshop skills without always realizing it. As they move through the steps, they are practicing:
- precise selections using the marquee tool
- working with layers and Smart Objects
- transforming and controlling direction
- refining with blur tools and other filters and tools
- cleaning up with masks
This is where the lesson starts to shift from following directions to making decisions.
Deeper Level Thinking and Decision Making
As they move further into the steps, refinement becomes the focus. Adding Motion Blur or Gaussian Blur helps smooth out the stretch, and masks allow them to clean up areas where the effect overlaps important parts of the image. This is often where students realize they have control over the outcome instead of feeling stuck with what they created.
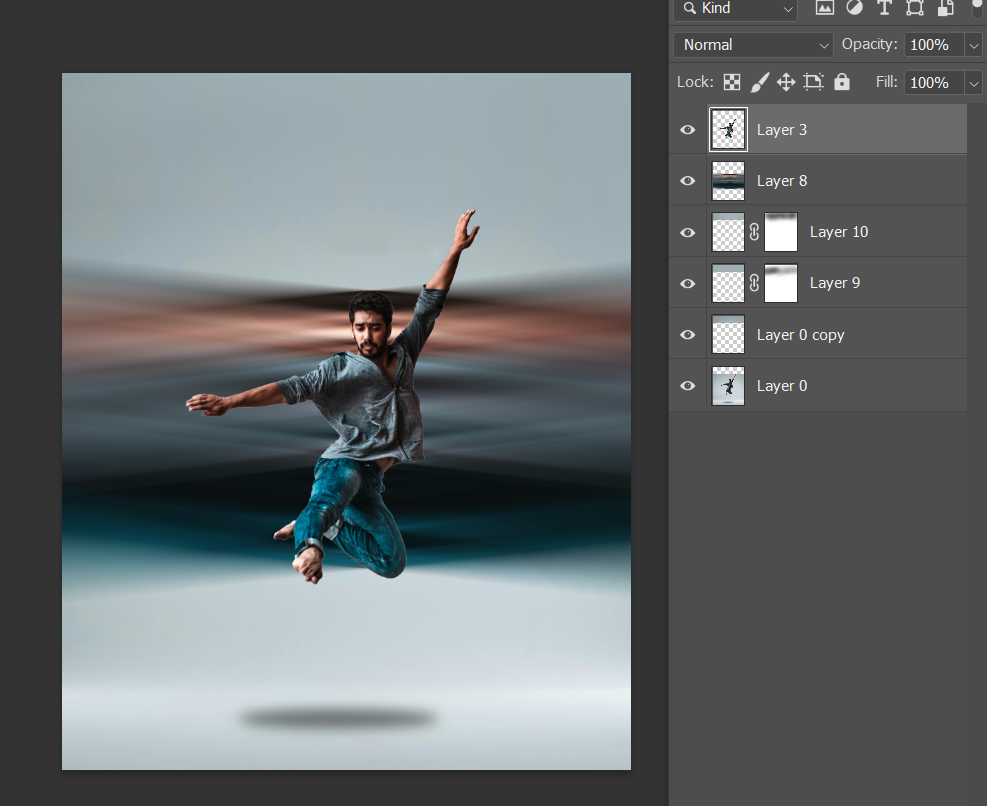
When they begin repeating the process and building multiple stretch layers, the effect becomes stronger and more visually interesting. This is also where you start to see students experiment. Some keep the effect subtle, while others push it further into something more abstract or stylized.
For students who are ready to go further, the advanced step using Warp or distortion filters allows them to manipulate the stretched pixels even more. This is where the project can move beyond a simple effect and start to feel like a unique design.
This lesson works well across different skill levels because it naturally builds complexity. Students who are newer can focus on the basic steps and still be successful. Students with more experience can layer effects, adjust direction, and refine their work at a higher level without needing a completely different assignment.
In real-world design, this type of effect is used to create energy and draw attention. You will see it in:
- sports and athletic branding
- music and album artwork
- social media graphics
- advertising campaigns
It helps designers suggest motion in a still image, which is especially important in fast-moving digital spaces.
What makes this project effective is that it helps students move from simply using tools to thinking about their choices. Instead of asking what tool to click next, they begin asking how to improve their work. They start adjusting their selections, refining their layers, and making decisions that improve the overall design.
That shift is what makes this lesson worth teaching.
Troubleshooting
One of the most common issues students run into happens early in the process.
In Step 3, when they make their selection, many students choose an area that is too large. It's either too wide or too long and this leads to a stretch that looks blocky instead of smooth. When they adjust and make a thinner selection, sometimes just a few pixels wide, the effect improves immediately - and they can see that quickly!
Another issue that can show up is when they are choosing where to stretch from initially or when they are adding to their initial choices. Students often pick areas with very little contrast or color. The result is a stretch that feels flat or unnoticeable. Encouraging them to select from areas with strong highlights, shadows, or color variation makes a noticeable difference in the final result.
One of the most difficult choices they will make is direction. To you and I it might feel obvious, but sometimes they struggle to choose vertical or horizontal to stretch the pixels. If they do not think about where the movement should go, the strtch can feel random. This is a good moment to pause and ask:
- What part of the image do you want people to look at first?
- Should the motion move toward or away from the subject?
Once students start thinking about direction, their work becomes more intentional.
When students move into more advanced levels, using the Warp or Distort Tools, you may run into more complications and students needing assistance. The Warp Tool itself can cause a lot of headache but it can also be incredible when they figure it out. Other than helping them FIND the warp icon when using transform tools, I like to let them have productive struggle with this part and then provide feedback on how to make it stronger.
Want this lesson?
What makes this project effective is that it helps students move from simply using tools to thinking about their choices. Instead of asking what tool to click next, they begin asking how to improve their work. They start adjusting their selections, refining their layers, and making decisions that improve the overall design.
That shift is what makes this lesson worth teaching.
If you want to try this in your own classroom, I’ve made the full Pixel Stretch lesson available for you to use. It includes:
- step-by-step student instructions
- a teacher-friendly lesson plan
- troubleshooting tips built into the workflow
- reflection questions and standards alignment
You can click here to download the lesson for free and see how it works with your students!
This is also just one example of the types of projects included in my Photoshop resources, where the goal is to help students build real skills while creating work they are actually excited about.